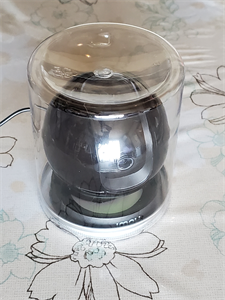
赤ん坊が一時的に滞在しているので、粉からミルクを作るために電気ポットを購入した。
沸騰ボタンを押した後に保温ボタンを押すと、沸騰した後に指定の温度に下がるまで待って24時間保温してくれる。
ほとんどは希望通りの機能なのだが、保温ボタンが毎回40℃から始まるのはちょっと。最初に押したときには前回の温度で初めてほしい。
赤ん坊が一時的に滞在しているので、粉からミルクを作るために電気ポットを購入した。
沸騰ボタンを押した後に保温ボタンを押すと、沸騰した後に指定の温度に下がるまで待って24時間保温してくれる。
ほとんどは希望通りの機能なのだが、保温ボタンが毎回40℃から始まるのはちょっと。最初に押したときには前回の温度で初めてほしい。
Let’s Encryptでサーバー証明書を作成した。
apacheのmod_mdモジュールでの作成、更新ができるらしいとどこかで見たので、試してみたがうまくいかない。
どうもWindowsでは動かないらしい。
http://apache-http-server.18135.x6.nabble.com/mod-md-1-1-0-repeating-on-error-td5040498.html
とりあえず、IIS用 ツールをWindowsサーバにインストール。
https://github.com/win-acme/win-acme/releases からwin-acme.v2.1.9.870.x64.trimmed.zipをダウンロードしてC:\Tooksに解凍。
Apacheを立ち上げておく。
C:/xampp/apache/conf/certsフォルダーを作成しておく。ACME.exeを管理者で起動する。
C:\Tools\win-acmw> acme.exe –test
Please choose from the menu: m
How shall we determine the domain(s) to include in the certificate?: 2
Enter comma-separated list of host names, starting with the common name: domain.com,www.domain.com
Suggested friendly name ‘[Manual] domain.com’, press <Enter> to accept or type an alternative: <Enter>
How would you like prove ownership for the domain(s)?: 1
Path to the root of the site that will handle authentication: C:/xampp/htdocs
Copy default web.config before validation? (y/n*) – no
What kind of private key should be used for the certificate?: 2
How would you like to store the certificate?: 2
Path to folder where .pem files are stored: C:/xampp/apache/conf/certs
Would you like to store it in another way too?: 5
Which installation step should run first?: 4
Enter email(s) for notifications about problems and abuse (comma seperated): postmaster@domain.com
Terms of service: C:\ProgramData\win-acme\acme-v02.api.letsencrypt.org\LE-SA-v1.2-November-15-2017.pdf Open in default application? (y/n*) n
Authorize identifier www.domain.com
Authorizing www.domain.com using http-01 validation (FileSystem)
Answer should now be browsable at http://www.domain.com/.well-known/acme-challenge/xxxxxxxxxxxxxxxx
Preliminary validation looks good, but the ACME server will be more thorough
Authorization result: valid
Requesting certificate [Manual] domain.com
Store with PemFiles…
Exporting .pem files to C:/xampp/apache/conf/certs
Installing with None…
Adding Task Scheduler entry with the following settings
– Name win-acme renew (acme-v02.api.letsencrypt.org)
– Path C:\Tools\win-acme.v2.1.9.870.x64.trimmed
– Command wacs.exe –renew –baseuri “https://acme-v02.api.letsencrypt.org/”
– Start at 09:00:00
– Time limit 02:00:00
Do you want to specify the user the task will run as? (y/n*) – no
How shall we determine the domain(s) to include in the certificate?: c
Please choose from the menu:q
正常に終了するとタスクスケジューラーにwin-acme renew (acme-v02.api.letsencrypt.org)タスクが追加される。
ステージングサーバー用と両方のタスクが登録されていると、ほぼ同時にフォルダーへのアクセスが起きるため、正常に更新されないことがある。どちらかの開始時間をずらしておく。
作成された証明書をapacheに以下で指定する
SSLCertificateFile "conf/certs/chombo.work-crt.pem"
SSLCertificateKeyFile "conf/certs/chombo.work-key.pem"
SSLCertificateChainFile "conf/certs/chombo.work-chain.pem"
apacheを再起動して以下のサイトなどで確認する
https://www.digicert.com/help/
最初は–testオプションを付けておき、成功したらオプションを外して実行する。正式版を発行するときは1日置かないと再度実行できないので一発勝負のつもりで。
複数のホストの入った証明書も可能だけれど、同じローカルフォルダーを参照していないとwin-acmeで認証されないみたい。
最初は実行途中で異常終了していたので、「Let’s Encrypt の証明書をブラウザ上で簡単取得」で試してみた。
https://qiita.com/tappie/items/76881fdf7996c57a105a
ここで作られた署名鍵、RSA秘密鍵をwin-acmeに読ませることでアカウントを設定でき、以後はwin-acmeだけで設定、更新できるようになる。
自動更新結果のメール連絡
settings_default.jsonファイルをsettings.jsonファイルにコピーし、メールアカウントを記入する。
"Notification": { "SmtpServer": "mail.domain.com", "SmtpPort": 25, "SmtpUser": "postmaster", "SmtpPassword": "xxxxx", "SmtpSecure": true, "SmtpSecureMode": 1, "SenderName": "win-acme", "SenderAddress": "postmaster@domain.com", "ReceiverAddresses": ["postmaster@domain.com"], "EmailOnSuccess": true, "ComputerName": "domain.com" },
自宅とAWS上でほぼ同じ内容のWebサーバーを稼働させている。
コンテンツはほぼ同じなのだが、ドメイン名とか違っているのでhttpd.confなどがそれぞれ別の内容になっている。
似たような内容が2か所にコピーされているのは間違いの元なので、一つのconfファイルが使えないかといろいろ試していてやっと実現できた。
confファイルの中で分岐させるのは<If>とか<SetEnvIf>とか<IfDefine>とかあるけど、<If>とかは実行時にページを要求されるごとに評価されるためか、うまく動かなかった。
<IfDefine>は起動時に評価されるため、なんとか実現できた模様。
以下はPC1という名前とPC2という名前の二つのPCが、それぞれdomain1.com,domaein2.comとうドメインを運用している前提で説明する。
httpd.confでApacheの環境変数を定義する。
Define COMPUTER_${COMPUTERNAME}
<IfDefine COMPUTER_PC1>
Define DOMAIN "domain1.com"
</ifDefine>
<IfDefine COMPUTER_PC2>
Define DOMAIN "domain2.com"
</ifDefine>
PCのシステム環境変数COMPUTERNAMEを使ってそれぞれ別のApache環境変数を定義している。
httpd-vhosts.confなどでは<IfDefine>を使ってそれぞれ固有の設定を記述する。
<IfDefine COMPUTER_PC1>
<Directory "C:/xampp/htdocs">
Options FollowSymLinks
AllowOverride All
Require all denied
Require ip ${IPADDR_LOCAL}
</Directory>
</IfDefine>
<IfDefine COMPUTER_PC2>
<Directory "C:/xampp/htdocs">
Options FollowSymLinks
AllowOverride All
Require all granted
</Directory>
</IfDefine>
<VirtualHost *:80>
ServerAdmin postmaster@${DOMAIN}
DocumentRoot "C:/xampp/htdocs"
ServerName www.${DOMAIN}
ServerAlias ${DOMAIN}
ErrorLog "| bin/rotatelogs.exe logs/${DOMAIN}-error_%Y-%m.log 86400"
CustomLog "| bin/rotatelogs.exe logs/${DOMAIN}-access_%Y-%m.log 86400"
</VirtualHost>
上記はPC1だけIPアドレスによるアクセス制限をかけている。
VirtualHostは、それぞれのドメインを同じ記述で別の定義を行っている。
それぞれのPC上で、以下のコマンドを使って実行時に設定されている内容を確認する。
httpd.exe -S VirtualHostの確認
httpd.exe -t -DDUMP_CONFIG 設定の確認